 Official Site® | trezor suite® | Getting Started
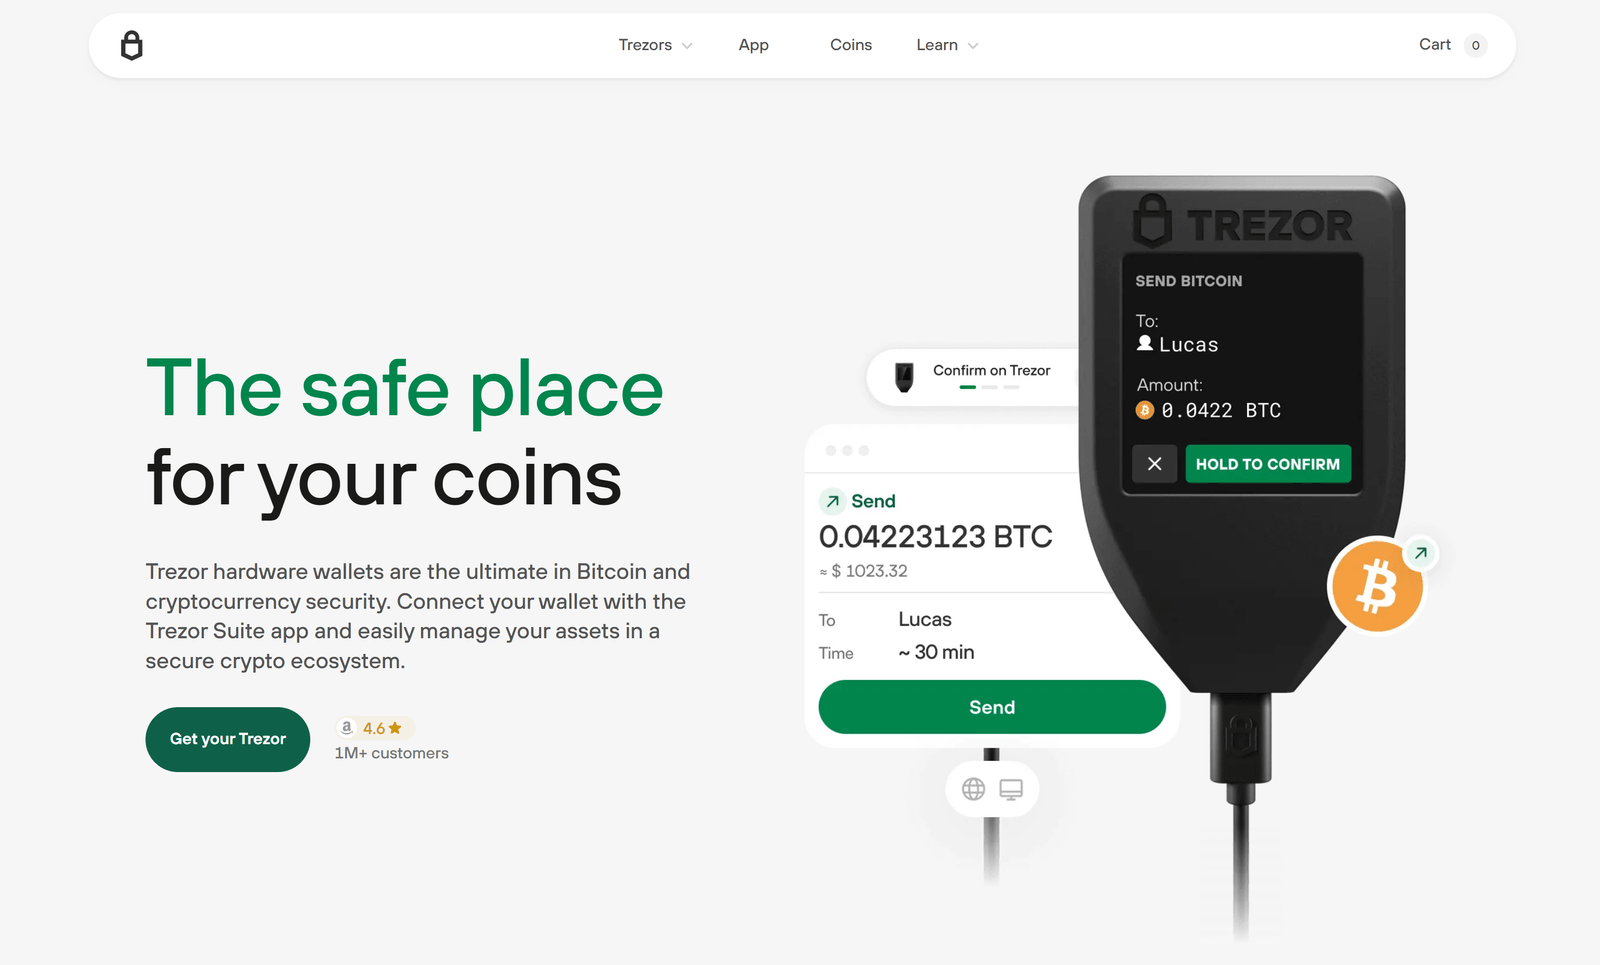
Trezor Suite Setup Guide for Beginners
Welcome! This tutorial walks you through installing and setting up your first Trezor Suite software wallet securely and confidently. Whether you want to manage altcoins, connect to decentralized apps (dApps), or safely store your recovery phrase, this guide covers everything you need.
Step 1: Download and Install Trezor Suite
Visit the official Trezor Suite download page:
https://trezor.io/trezor-suite.
- Select the version for your platform (Windows, macOS, or Linux).
- Download the installer and follow your operating system’s prompts to install.
- Once installed, launch the Trezor Suite application.
Step 2: Connect Your Trezor Device and Install Trezor Bridge
The Trezor Bridge software enables secure communication between your computer and the Trezor device.
- Download Trezor Bridge from https://trezor.io/bridge (if the Suite prompts you).
- Follow the installation instructions for your operating system.
- Connect your Trezor hardware wallet to your computer using the supplied USB cable.
- The Suite will detect your device and prompt for the next steps.
Step 3: Initialize Your Wallet via Trezor.io/Start
- From within Trezor Suite, click "Create New Wallet" or use Trezor.io/Start to initialize your device.
- Set a secure PIN directly on your Trezor device to protect access.
- Write down your Trezor Suite recovery phrase (the recovery seed) on the provided physical card.
- Store this seed phrase offline in a secure place; never save it digitally or share it.
- Verify your recovery phrase when prompted by the Suite to ensure accuracy.
Step 4: Manage Your Crypto and Connect to dApps
With your device set up, use Trezor Suite to manage multiple altcoins and connect with decentralized finance (DeFi) apps safely.
- Add supported cryptocurrencies (Bitcoin, Ethereum, ERC-20 tokens, and more) within the Suite.
- Use the integrated portfolio tracker to view your balances and transaction history.
- Connect to dApps securely by pairing your wallet via WalletConnect functionality embedded in the Suite.
- Optionally install the Trezor Suite browser extension for faster and safer interactions with certain dApps.
- Download the Trezor Suite mobile app to manage your crypto on the go.
Security Best Practices
- Always approve transactions manually on your connected Trezor device.
- Keep your recovery phrase offline and physically secure.
- Regularly update Trezor Suite and your device firmware to benefit from security patches.
- Avoid using public or unsecured Wi-Fi when managing your wallet.
Frequently Asked Questions (FAQs)
1. What is the purpose of Trezor Bridge?
Trezor Bridge acts as a secure communication layer between your hardware wallet and the Trezor Suite app, ensuring encrypted and safe data transfers.
2. Can I import an existing wallet into Trezor.io/Start?
Yes, you can restore or import an existing wallet by entering your recovery phrase during the initial setup within Trezor.io/Start or Trezor Suite.
3. Does Trezor Suite support mobile devices?
Yes, there is a mobile version of Trezor Suite available for download from the official site, allowing you to manage your crypto securely on your phone.
4. What is the Trezor Suite browser extension?
The browser extension facilitates smoother integration with web dApps and enhances secure interactions when connecting your wallet on various websites.
5. How should I store my Trezor Suite recovery phrase?
Write it down on the recovery card provided and keep it in a safe offline location. Never store it digitally or share it with anyone to avoid theft.